
Sync
Google Sheets
If you connect your Google account, Lightning Autofill will automatically back up your Form Fields, Advanced, Exceptions, Text Clips, and Variables data to a Google Sheets spreadsheet. Now you can have the peace of mind that if you ever lose access to your computer or accidentally remove Lightning Autofill, your data would still be safe in the cloud. You can connect to one Google account at a time across all your devices.
Connect – Click this button to begin the connection process. After you have successfully connected, this button will be replaced with Disconnect (see below).
👇 NOTE
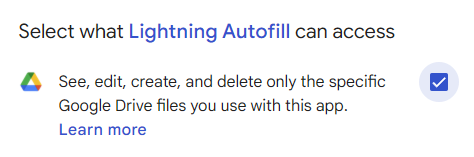
In the Google authorization popup (OAuth consent screen), be sure to check the checkbox next to “See, edit, create, and delete only the specific Google Drive files you use with this app” to grant Lightning Autofill permission to perform the cloud sync.
Open in Sheets – Click this button to open the “Lightning Autofill backup” spreadsheet in Google Sheets. Instead of managing your autofill rules in Lightning Autofill Options, you can manage them in Google Sheets and sync your changes back to Lightning Autofill by clicking on the Restore button (see below) or enabling the “Bi-directional cloud sync” option. Here’s what you can do in Google Sheets:
- Add additional columns after the “HELP” column
- Add additional sheets (they can be in any order)
- Filter data
- Format cells
- Record macros for automation
- Rename the spreadsheet
- Resize columns and rows
- Search and replace
- Sort rows
These operations are NOT ALLOWED and can break the sync:
- Delete or move any of the default columns
- Delete or rename any of the default sheets
- Remove any of the data validation rules
- Rename any of the default column headers
Default spreadsheet name – This is the default Google Sheets spreadsheet name when creating new backup files.
Active spreadsheet – Select which Google Sheets spreadsheet you would like to use to sync your data to or restore from. Select “Sync to a new spreadsheet” to instantly back up the current data to a new spreadsheet. Note that if you delete the active spreadsheet in Google Sheets and reload Lightning Autofill Options without selecting a new active spreadsheet first, then Lightning Autofill will automatically create a new backup spreadsheet for you.
Restore – Click this button to restore your data from Google Sheets.
💡 TIP
Once the backup spreadsheet has been created, you can rename it to whatever you want in Google Drive or Sheets. You can keep multiple backups for different purposes and choose which version to restore.
Disconnect – Click this button to disconnect your Google account. Since you can only have one Google account connected to a subscription plan at a time, when you disconnect an account in one browser, all instances of Lightning Autofill running in other browsers will also be disconnected.
👇 NOTE
If you sync to Google Sheets, please be aware that it has a cell limit of 50,000 characters, so the sync will fail if you have a rule, text clip, or variable that exceeds this limit.
🌟 PLUS/PRO
Google Sheets backup/restore (cloud sync) is only available to Plus and Pro subscribers.
Import/Export
Import allows you to load data from a local CSV file. The CSV data structure needs to be arranged in the following format:
- Profiles (columns):
- Profile ID (e.g.,
c1) - Name – profile name
- Site – profile site filter
- Hotkey – profile hotkey
- Profile ID (e.g.,
- Rules (columns):
- Rule ID (e.g.,
r1) - Type – rule type (
0for Text,1for Password,2for Select,3for Checkbox/Radio,4for JavaScript, and5to12for actions) - Name – field identifier
- Value – text to autofill or code to execute
- Site – rule site filter
- Mode – form fill method (
0for Safe,1for Overwrite,2for Prepend,3for Append,4for Wrap,5for Increment, and6for Decrement) - Profile – ID of the profile this rule belongs to (empty if it’s “Unfiled”)
- Rule ID (e.g.,
- Settings:
advanced– list of configurations in the Advanced tabexceptions– list of site filters in the Exceptions tabtextclips– list of snippets and shortcodes in the Text Clips tabvariables– list of variables in the Variables taballhotkey– hotkey to execute the “All” profileimporturl– URL of remote file to import data fromlastmod– last modified date of active spreadsheetspreadsheetid– active Google Sheets spreadsheet ID for cloud syncspreadsheetname– default Google Sheets spreadsheet name when creating a new file for cloud syncactivecat– “Autofill active profile only” option (1to enable,0to disable)attributesoff– “Attributes to remove” option (1to enable,0to disable); list of attributes separated by spacesbackup– “Back up text fields” option (1to enable,0to disable); minimum characters to back upbadge– “Icon badge” option (1to enable,0to disable)bisync– “Bi-directional cloud sync” option (1to enable,0to disable)captchas– “Autofill CAPTCHAs” option (1to enable,0to disable)closeinfobar– “Auto-close infobar” option (1to enable,0to disable); menu selection (index starting from 0)debug– “Debug mode” option (1to enable,0to disable)delay– “Autofill delay” option (1to enable,0to disable); number of seconds to delay before autofillingexeinorder– “Execute in order” option (1to enable,0to disable)expirecats– “Profile expiration” option (1to enable,0to disable)filtercats– “Filter profiles” option (1to enable,0to disable)fluid– “Fluid layout” option (1to enable,0to disable)hidebackup– “Hide backup profiles” option (1to enable,0to disable)ietextbox– “Import/Export text box” option (1to enable,0to disable)manual– “Manual mode” option (1to enable,0to disable)mask– “Mask passwords” option (1to enable,0to disable)menu– “Context menu” option (1to enable,0to disable); menu selection (index starting from 0)overwrite– “Overwrite by default” option (1to enable,0to disable)parselabels– “Parse labels” option (1to enable,0to disable)randdelay– “Randomize delay” option (1to enable,0to disable)reveal– “Reveal password” option (1to enable,0to disable); menu selection (index starting from 0)review– “Review changes” option (1to enable,0to disable); menu selection (index starting from 0)sitefilters– “Site filters” option (1to enable,0to disable); menu selection (index starting from 0)skiphidden– “Skip hidden fields” option (1to enable,0to disable)sound– “Sound effects” option (1to enable,0to disable)textexpansion– “Text expansion delimiter” option (1to enable,0to disable); delimiter charactertheme– “Theme” option (1to enable,0to disable); menu selection (index starting from 0); menu selection (index starting from 0); background color; foreground colortooltips– “Tooltips” option (1to enable,0to disable)turbo– “Turbo mode” option (1to enable,0to disable)vars– “Expand variables” option (1to enable,0to disable)
Export allows you to save all your autofill rules and settings to a local CSV file for backup. Once your data is stored in an external file, you can later use the Import feature to restore the data in your current browser or transfer the data to Lightning Autofill in another browser (e.g., Brave, Edge, Firefox).
Import mode
- Append – Append data in the CSV file to the existing data. This option allows you to import individual sections (e.g.,
### AUTOFILL PROFILES ###). It’s also a great way to import recipes using remote import. - Replace – Replace all data with data imported from the CSV file. Use this option to restore your autofill rules and settings.
💡 TIP
If you have a lot of autofill rules you’d like to reorder, then it’s faster if you export your data to a CSV file, reorder the rules in a text editor, and import the data back into Lightning Autofill. Similarly, if you want to move many rules into different profiles at once, then it’s best to do this by reassigning their profile IDs in the CSV file directly. Once you get familiar with the CSV data structure, you can edit your autofill rules and settings in bulk before importing them back into Lightning Autofill. This can save you a lot of time (🎞️ watch tutorial).
Remote import 🎞️
As an alternative, you can also import data from a remote file by entering the file’s URL in this field and clicking Import URL. The URL needs to point to a plain text file that has the same structure as the exported CSV data. The server hosting this file needs to have the following two response headers:
Access-Control-Allow-Origin: *Content-Type: text/plain
The first header is to prevent cross-origin errors; the second header ensures that the file is served in plain text format (as opposed to HTML). Data that is imported into Lightning Autofill remotely can be referred to as “recipes”. Here’s a sample recipe that has rules to autofill the Practice Form: