
Frequently Asked Questions
1. I don’t get it—how does Lightning Autofill work?
The easiest way to see how it works is to go to the practice page and generate some rules:
- Go to the Practice Form.
- Fill out some fields.
- Click the Lightning Autofill icon in the toolbar (if you don’t see the icon, then it’s most likely hidden, so click the menu icon to get to it).
- Create a new profile to save the rules in if you want to organize them by topic or website (this step is optional).
- Click the Generate Autofill Rules button.
Now when you reload the page, all the fields that you filled out before should be autofilled.
2. How come some fields are not being autofilled?
The web is like a wilderness—you never know what you’ll encounter. With this said, there are generally two types of forms that can trip up Lightning Autofill:
Forms that use dynamic field names. The rules generated by the Lightning Autofill infobar should work most of the time, but there are some complex forms where these rules will fail to work because every time you load the page the input elements’
nameattribute values change (e.g., they contain a randomly generated string or timestamp). For example, the first time you use the infobar rules generator thenameattribute for the First Name field is “fname1481162526802”, so the generated rule is"fname1481162526802"; however, the next time you visit the page thenameattribute changes to “fname1481162889085”, so of course the rule won’t match anymore, and hence this field will not get autofilled. In such cases, you’ll have to manually tweak the rules generated by the infobar so that they will continue to match. You can try a partial text match likefname, a regex pattern like/^fname/(attribute value begins with “fname”), or you can try matching against one of the other supported attributes instead of thenameattribute if the values in those attributes don’t change.Forms that rely on elements not supported by Lightning Autofill. Only traditional form elements (
<input>,<select>,<textarea>) are supported by the infobar rules generator; for everything else, you’ll have to write custom JavaScript rules. A good example is this Vue.js sample form. You cannot generate autofill rules for these checkboxes because they are made of<div>elements instead of<input type="checkbox">. If you inspect the HTML code for the Orange checkbox, you will see that it looks like this:html<div class="q-checkbox cursor-pointer no-outline row inline no-wrap items-center q-checkbox--dense" tabindex="0" role="checkbox" aria-label="Orange" aria-checked="false"> <div class="q-checkbox__inner relative-position non-selectable q-checkbox__inner--falsy" aria-hidden="true"> <input class="hidden q-checkbox__native absolute q-ma-none q-pa-none" type="checkbox" /> <div class="q-checkbox__bg absolute"> <svg class="q-checkbox__svg fit absolute-full" viewBox="0 0 24 24"> <path class="q-checkbox__truthy" fill="none" d="M1.73,12.91 8.1,19.28 22.79,4.59"></path> <path class="q-checkbox__indet" d="M4,14H20V10H4"></path> </svg> </div> </div> <span class="no-outline" tabindex="-1"></span> <div class="q-checkbox__label q-anchor--skip">Orange</div> </div>To auto-click the Orange checkbox, you’ll have to use a JavaScript rule. Try this:
jsconst orange = document.querySelector('[role="checkbox"][aria-label="Orange"]'); orange?.click();The first line uses
querySelector()to select the checkbox using the[role="checkbox"][aria-label="Orange"]CSS selector and saves it to constantorange. The second line clicks the checkbox if it exists. When you create a JavaScript rule, the most important thing is to figure out what CSS selector to use to target an element so that you can act upon it (e.g.,element.click()to simulate a mouse click orelement.value = 'something'to autofill). Here are some online references in case you want to dive deeper:
If all else fails and none of the rules work for you, then as a last resort you can follow the instructions in the answer to question 8.
3. How do I auto-click a button?
You can use a JavaScript rule to auto-click a button among many other things (e.g., automatically submit a form after autofilling). Right-click on the button you want to auto-click and select “Inspect”. You should see the underlying HTML code for that button highlighted in the Elements panel. Below is the code that you would enter in the Value column for various types of buttons.
<input type="submit" value="Apply">
document.querySelector('[type="submit"][value="Apply"]').click();<button id="continue-btn">Continue</button>
document.getElementById('continue-btn').click();OR
document.querySelector('#continue-btn').click();If click() is not working for you, then you can manually trigger a ‘click’ event like this:
const clickEvent = new Event('click', { 'bubbles': true });
document.getElementById('continue-btn').dispatchEvent(clickEvent);
As an alternative, you can add this JavaScript rule after normal autofill rules to auto-submit the form:
Type = JavaScript
Value =
// This auto-submits <form name="someform">
document.querySelector('form[name="someform"]').submit();
Also be sure to check out cuddlycows’ excellent How-To auto-submit a form tutorial.
4. How do I randomly select a checkbox from a group of checkboxes?
To randomly select a checkbox from a group of checkboxes, you need to use a JavaScript rule. For example, here’s a rule that randomly ticks one of the four checkboxes on this test page:
Type = JavaScript
Value =
const sports = ['baseball', 'basketball', 'football', 'soccer'];
const randomSport = sports[Math.floor(Math.random() * sports.length)];
document.querySelector('[type="checkbox"][value="' + randomSport + '"]').checked = true;
To randomly toggle a checkbox on or off, use the “?” value, e.g.:
Type = Checkbox/Radio
Name = "subscribe"
Value = ?
5. How do I wait for a dropdown menu to be populated before autofilling it?
A common scenario for this is when you want to select a State dropdown menu, but it’s only populated when you select Country = “US”. If you use a standard autofill rule for the state, then Lightning Autofill will try to execute it before the State dropdown menu is fully populated with all the states, so the rule will likely fail. To work around this, you’ll have to use a JavaScript rule. Let’s say you have this HTML code:
<label for="country">Country</label>
<select id="country">
  ...
  <option value="US">United States</option>
  ...
</select>
<label for="state">State</label>
<select id="state">
  <!-- Initial state is empty -->
</select>
Your rule would look something like this:
Type = JavaScript
Value =
const changeEvent = new Event('change', { 'bubbles': true });
const country = document.getElementById('country');
const state = document.getElementById('state');
// Select country
country.value = 'US';
// Trigger country `change` event
country.dispatchEvent(changeEvent);
// Select state when it's populated with states
const timer = setInterval(() => {
  if (state.options.length > 1) {
    state.value = 'California';
    // Trigger state `change` event
    state.dispatchEvent(changeEvent);
    // Stop the interval
    clearInterval(timer);
  }
}, 100); // Poll every 100 milliseconds
The same concept applies to fields that are added to the document after the page loads (i.e., created dynamically). For example, here’s how you would auto-post a comment on YouTube:
// Poll the page every second
const timer = setInterval(() => {
  // Wait for the placeholder first
  const placeholder = document.getElementById('placeholder-area');
  if (placeholder) {
    // Click the placeholder to render the comment box
    placeholder.click();
    // Wait for the comment box
    setTimeout(() => {
      const comment = document.getElementById('contenteditable-root');
      if (comment) {
        // Autofill the comment box after a short delay
        comment.textContent = 'Cool!';
        // Simulate input to enable the Comment button
        comment.dispatchEvent(new Event('input', { bubbles: true }));
        // Wait for Comment button to be enabled
        setTimeout(() => {
          // Click the Comment button to post your comment
          document.querySelector('button[aria-label="Comment"]').click();
        }, 100);
      }
    }, 100);
    // Stop the interval
    clearInterval(timer);
  }
}, 1000);
6. How do I implement a text spinner?
Let’s say you have the following input fields and you want to fill them with the values “red”, “green” and “blue”, where each value is only used once:
<input name="color1">
<input name="color2">
<input name="color3">
Starting from Lightning Autofill v10, you can use the new shrinking text spinner variable to accomplish this. Here’s what the rule would look like:
Type = Text
Name = /^color[1-3]$/
Value = {(red|green|blue)}
As an alternative, you can also use a JavaScript rule. Your rule would look something like this:
Type = JavaScript
Value =
// Define the lists (arrays)
const colors = ['red', 'green', 'blue'];
const fields = ['[name="color1"]', '[name="color2"]', '[name="color2"]'];
// Loop through the fields
for (const field of fields) {
  // Fill with a random color from the colors list
  const colorIndex = Math.floor(Math.random() * colors.length);
  document.querySelector(field).value = colors[colorIndex];
  // Remove used color from the colors list
  colors.splice(colorIndex, 1);
  // Exit when there are no more colors
  if (!colors.length) break;
}
7. Where does Lightning Autofill store its data, and does it send the data anywhere?
Lightning Autofill stores its data using the browser’s chrome.storage API. Lightning Autofill does not and will never send your data anywhere, except when you connect your Google account to sync your data to Google Sheets (see below). You can verify this by monitoring the Network panel in developer tools. Lightning Autofill doesn’t even track you using Google Analytics or anything else. Note that even though your data is not sent anywhere, you should still NOT use Lightning Autofill to store sensitive or confidential information since the storage area is NOT encrypted, which means anybody with access to your computer will be able to see whatever you store in Lightning Autofill if they know where to look.
Users on the Plus or Pro plan have the option to back up their data to Google Sheets (cloud sync), in which case the data is also saved in a Sheets spreadsheet in their Google account. Note that if you delete this spreadsheet, Lightning Autofill will continue to sync to it since the document will live in the trash for 30 days. A new spreadsheet will be created automatically at the next sync once the existing backup spreadsheet is permanently deleted.
8. How do I autofill a form that uses divs instead of form tags?
Instead of using traditional form elements (input, select, textarea), more and more modern forms use generic elements like div and span to make the UI look pretty, but behind the scenes there is likely JavaScript that stores the selected values in hidden input fields (a good example is Google Forms). Since these “rich” forms are tricky to reliably autofill, we recommend either of the two methods below to manually create the rules. Between the infobar-generated rules and the course of action outlined here, you should be able to autofill the vast majority of forms; however, you never know with the internet, so your mileage may vary.
Method 1: Target the form directly. Since the main purpose of a form is to submit information back to the server, you can short-circuit the input selection process and set the relevant form values directly. Modern browsers come with a great tool to monitor what information is sent when you submit a form, which you can use to craft your autofill rules. Here are the steps:
Go to the page with the form you want to autofill.
Open developer tools (F12 or Ctrl + Shift + I).
Go to the Network panel.
Ensure the “Preserve log” option is checked.
Look for the
<form>element containing the fields you want to autofill and make a note of theactionattribute value. This is the server script that handles the form data. Also make a note of the form’sidornameattribute value, which you’ll need to submit the form later on (last step). A quick way to find the correct<form>element is to right-click on a field and select “Inspect”, then follow the breadcrumbs at the bottom of the Elements panel from right to left until you get to the relevant form.Fill out the form with the values you want and submit it.
In the Network panel, click the link to the form
actionscript from step 5. If you see multiple rows with the same name, then click on the one with “document” under the Type column.Go to the Payload tab. You should see the submitted form data under “Query String Parameters” (expand it if it’s collapsed); make a note of all the parameters. For example, if you were to search for “autofill” on Google, you would see something like:
q: autofill
sca_esv: <gibberish>
sxsrf: <gibberish>
ei: <gibberish>
ved: <gibberish>
uact: 5
oq: autofill
gs_lp: <gibberish>
sclient: gws-wiz-serp
The text to the left of the colon is the parameter key, and it maps to the input’s
nameattribute; the text to the right of the colon is the parameter value, and it maps to the input’svalueattribute. A parameter refers to this key-value pair. These parameters are sent to the server when you submit the form, and they’re the only things that matter as far as Lightning Autofill is concerned. Once you know what the parameters should be, then you are ready for the next step…Create autofill rules for the fields from step 8 (assuming these are hidden inputs, which are equivalent to text inputs). The rules for the example above would look like this:
Type = Text
Name ="q"
Value =autofillType = Text
Name ="oq"
Value =autofillYou can usually get away with assigning a value for only the relevant fields, but you should experiment to see what works. If a rule doesn’t work, then there’s a chance that Lightning Autofill is executing it too fast, in which case you can add a delay by setting a global delay (Lightning Autofill Options / Settings tab), setting a profile- or rule-specific delay (Lightning Autofill Options / Advanced tab), or using a JavaScript rule, e.g.:
Type = JavaScript
Value =js// Autofill after 2-second delay setTimeout(() => { document.querySelector('[name="q"]').value = 'autofill'; document.querySelector('[name="oq"]').value = 'autofill'; }, 2000);This tells Lightning Autofill to wait 2000 milliseconds (2 seconds) before executing the JavaScript code. If you want to increase the delay, then change
2000to a larger number.
Method 2: Simulate user input. In theory, you should be able to autofill any form by simulating a human being via JavaScript. Here’s a rule that simulates a person selecting the German language from a sample Google Form:
Type = JavaScript
Value =
// Open the Target Language dropdown
document.querySelector('[jsname="d9BH4c"]').click();
// Add a half-second delay to wait for the dropdown to open
setTimeout(() => {
  // Click "German" in the dropdown menu
  // NOTE: When the dropdown is open, there are two elements with the same
  // value, so we have to use querySelectorAll() to select the second element.
  // The second element is denoted by `[1]` (index starts at 0 in JavaScript).
  document.querySelectorAll('[data-value="German"]')[1].click();
}, 500);
9. How do I create an autofill rule using the values from existing rules?
First, enable variables by going to Lightning Autofill Options / Settings tab and make sure the “Expand variables” option is checked. To use the value from an existing rule, you need to determine its field ID by hovering your mouse pointer over the Name or Value column. For example, if Value ID v1 autofills the first name and Value ID v2 autofills the last name, then you can create a rule to autofill the full name by entering this into the Value column: {v1} {v2}.
10. What does the number on the lightning bolt icon mean?
This number, also called an icon badge, represents the number of autofill rules that were executed on the current page. Sometimes this number can be higher than you expected because Lightning Autofill runs in all iframes in addition to the main page (top frame).
11. How come the extension icon is grayed out sometimes?
The lightning bolt icon is grayed out when there are no fields to autofill, or when the document <title> or URL matches something on the Exceptions list. The icon will light up when the following elements are detected: <input>, <select>, <textarea>, <iframe> (generally used by rich text editors), and elements that have the contenteditable="true" attribute. The icon is also grayed out when the extension auto-updates in the background; if this happens on a page with form fields, then you should reload the page to resume proper autofilling operation.
👇 NOTE
There has been reports that if you have pending Windows updates, the extension icon can remain grayed out after you reload the web page. If you experience this, try completing all pending Windows updates and rebooting your PC.
12. How do I manually create an autofill rule?
Follow these steps:
Right-click on the field you’d like to autofill and select “Inspect”. This will bring up the field’s HTML code. Most form fields should have a
nameoridattribute; the value in this attribute will act as a unique identifier for the autofill rule. See Form Fields for a full list of attributes you can match against.Go to Lightning Autofill Options / Form Fields tab and click the + button. This will add a new row to the rules table.
Here’s what you would enter for each column in the row:
- Type – the type of rule it is. This should be self-explanatory. JavaScript rules allow you to automatically execute JavaScript code on page load for the most powerful automations. Actions (in all caps) allow you to automate most things without knowledge of JavaScript.
- Name – a unique identifier for the field to autofill. Use the attribute value from step 1. Note that Lightning Autofill does a partial match by default, so if you enter
emailand there’s another field withname="email2", then this rule will autofill both fields. To prevent this, enter"email"or/^email$/to force an exact match. - Value – the text to autofill or code to execute.
- Site – the document
<title>or URL. This acts as a site filter to trigger the autofill, so it’s highly recommended that you enter something or else Lightning Autofill will blindly autofill every field of the selected rule type. - Mode – leave this on Safe. If the field contains a default value that you’d like to overwrite, then change the mode to Overwrite.
The most important step: click Save.
The rule you just created should kick in and automatically fill out that field when you reload.
13. How do I use a JavaScript rule to check every checkbox on the page?
You don’t even have to use a JavaScript rule for this—you can simply use a Checkbox/Radio rule, leave the Name column blank, and enter 1 for the Value column to check every checkbox on the page. However, if you still want to use a JavaScript rule, then you can use this code:
document.querySelectorAll('input[type="checkbox"]').forEach((checkbox) => {
  checkbox.click();
});
This will click every checkbox, so if one is already checked then it will be unchecked. If you want to have every checkbox checked regardless of its state, then enter this instead:
document.querySelectorAll('input[type="checkbox"]').forEach((checkbox) => {
  if (!checkbox.checked) checkbox.click();
});
14. What if I have multiple sets of data I want to autofill for the same form?
Profiles are a great way to select which set of data to fill the form with. You can create a profile for each set of data. You may also want to enable manual mode (Lightning Autofill Options / Settings tab) for this purpose. Now you’ll be able to manually execute all the rules in a profile from the infobar or right-click context menu (Lightning Autofill → Execute profile), or by pressing the assigned profile hotkey.
15. Can I use jQuery in a JavaScript rule?
Lightning Autofill versions prior to v12 had a special function called injectJquery() to inject the jQuery library, but that has since been removed since vanilla JavaScript can now do most of what jQuery was being used for (e.g., querySelector(), querySelectorAll()).
16. Does Lightning Autofill support automating file uploads?
No, for security reasons modern browsers don’t allow autofilling of <input type="file"> elements. The best solution for this is to use a screen recorder or macro utility like AutoHotkey.
17. Does Lightning Autofill support autofilling CAPTCHAs?
It depends on the type of CAPTCHA. To our knowledge, there is currently no good way to extract text from a CAPTCHA image with 100% accuracy using JavaScript. Please post in the Discord community if you have a good solution for this. However, it is possible to auto-check the “I’m not a robot” reCAPTCHA. For example, here’s a rule that works on this reCAPTCHA demo:
Type = JavaScript
Value =
document.querySelector('.recaptcha-checkbox-checkmark').click();If you’re a Pro subscriber, you can also enable the experimental “Autofill CAPTCHAs” option in Lightning Autofill Options / Settings tab.
18. Can I make changes directly in Google Sheets?
By default, any edits you make in Google Sheets will not sync back to Lightning Autofill and will be overwritten whenever you make changes in Lightning Autofill Options. However, if you enable the experimental “Bi-directional cloud sync” option in Lightning Autofill Options / Settings tab, then changes you make in Google Sheets should sync back to the extension.
19. How do I add a delay for a specific rule?
You can set three levels of delay in Lightning Autofill:
- Global delay – this affects all rules in all profiles. Set this in the Settings tab.
- Profile-level delay – this affects all rules in the specified profile. For example, to set a 2-second delay for all rules in profile c1, enter this in the Advanced tab:
c1: delay=2 - Rule-level delay – this affects only the specified rule. For example, to set a 2-second delay for rule r1, enter this in the Advanced tab:
r1: delay=2
An alternative solution is to use a JavaScript rule that looks something like this:
// Autofill after 2-second delay
setTimeout(() => {
  document.querySelector('input[name="fname"]').value = 'Bob';
}, 2000);
20. How do I increment a number in an existing form field?
Let’s say you want to increment the number in <input id="count">. You would create a JavaScript rule and enter this code:
const count = document.getElementById('count');
let n = +count.value; // convert string to number
count.value = ++n; // increment number
21. What if I need further assistance?
If you need further assistance, please visit the official Lightning Autofill support community to start a new discussion or join an existing one. The old Google Group also contains a wealth of information, although it is no longer maintained. To get acquainted with Lightning Autofill, see what the autofill rules look like for the Practice Form by automatically generating them using the infobar as outlined in the answer to question 1.
22. Can I bookmark the Lightning Autofill Options page?
Yes, you can bookmark the Options page for quick access. For example, this is the URL for the Lightning Autofill Options page in Google Chrome:
chrome-extension://nlmmgnhgdeffjkdckmikfpnddkbbfkkk/options.html
The Options page can also be accessed through the right-click context menu if the context menu is enabled in Lightning Autofill Options / Settings tab, or by right-clicking on the extension icon (lightning bolt) in the toolbar and selecting “Options”.
23. What exactly is a “form field” anyway?
A form field, also known as a form control or form element, is used to submit data from the client (your browser) to the server. It can have the following HTML tags: <input>, <select>, <textarea>. Though not technically a form field, Lightning Autofill also supports WYSIWYG edit boxes that use <div contenteditable="true"> or <iframe> elements.
24. What should I enter in each column of the rules table on the Form Fields tab?
Move the mouse pointer over the  question mark icon in the column header for some guidance. A detailed description is also available by clicking the Help button.
25. Can I reorder the autofill rules?
Yes, you can reorder any rule by dragging the  icon on the right. If you’re currently editing inside a text box, then you can press Alt + ↑ to move that rule up or Alt + ↓ to move it down.
26. Can I duplicate a profile?
Yes, you can duplicate profiles from the Manage Profiles dialog (Lightning Autofill Options / Form Fields tab / Profiles dropdown menu / Manage Profiles). The Manage Profiles dialog also allows you to add, rename, reorder, delete, and export profiles.
If you’re comfortable working with CSV data, then you can also duplicate a profile this way:
- Create a new empty profile in Manage Profiles.
- Export the data to a CSV file under the Sync tab.
- Open the CSV file in a text editor like Notepad.
- Copy the rows of the profile you want to duplicate and paste them immediately above
### AUTOFILL SETTINGS ###. - In the newly pasted rows, change the profile ID to the ID of the profile you created in step 1 (this can be found under the
### AUTOFILL PROFILES ###section). - Import the CSV data back into Lightning Autofill.
If you master the CSV data structure, you can do all sorts of raw manipulations in your text editor, copy all, and then paste directly into the Import/Export text box (enable this in Lightning Autofill Options / Settings tab). This opens up a whole new level of flexibility and power for you. Note that if you copy directly from Excel, some values may change as Excel does some autocorrections (e.g., “01” and “1.0” will be changed to “1”), which can lead to unexpected results. This is the reason why you should manipulate the CSV data in a text editor instead of Excel.
27. How come the profile hotkey didn’t work?
Chances are likely that this hotkey is already used by the browser, another browser extension, another desktop application, or your operating system. Try setting another hotkey.
28. What if I want to create an autofill rule for only one specific field?
You can generate an autofill rule for one text field by right-clicking inside this field and selecting “Add rule for this field…” in the Lightning Autofill context menu.
29. Can I disable a specific rule in a profile?
The quickest way to disable a rule is to set its site filter to something that will never match, like "". If you have multiple rules or profiles you want to quickly toggle on and off, then you can create a variable like this in Lightning Autofill Options / Variables tab:
toggle = ""You would then enter {@toggle} in the Site field. Whenever you want to re-enable the rule or profile, you simply need to replace "" with a matching pattern in the Variables tab.
30. Can I make the text boxes on the Form Fields tab any bigger?
You can resize a text box by dragging the  diagonal gripper at the bottom right corner of the box. The new size will be preserved until you reload the page. You can also click the Edit button to edit the text in a code editor (very useful for JavaScript rules).
31. I’m a keyboard warrior—are there any keyboard shortcuts?
Yes, see Hotkeys.
32. Just curious, what technologies did you use to make Lightning Autofill?
We developed this extension mainly using HTML, CSS, and JavaScript. HTML: data attributes for various functionalities on the Lightning Autofill Options page, the <audio> element for sound effects, and range input for the slider control. CSS: border-radius for the rounded corners, box-shadow for the gradient shadows, flexbox for the rules table and modal dialogs, and transitions / transforms for the animations. Microsoft Ajax Minifier was used to keep the extension fast and light, and no JavaScript frameworks were used to further reduce the weight. All JavaScript performance testing was done using jsPerf JSBench. All coding was done in Notepad2, then Notepad++, and currently Visual Studio Code.
33. What’s new in this version?
Click on the version number in the upper right corner to see the changelog.
34. How can I help translate Lightning Autofill into my local language?
We stopped offering localizations since v12.5.0 because our small bootstrapped team didn’t have enough resources to maintain all the translations. Besides, modern browsers have built-in translations now. Here’s an example of the Lightning Autofill Options page translated to Portuguese in Microsoft Edge:
35. Is Lightning Autofill open source?
No, the Lightning Autofill extension is currently not open source.
36. This extension has saved me a ton of time—any way I can give back?
We have poured countless hours into Lightning Autofill over the years, which began life in 2010 as an accessibility tool for computer students with disabilities, and eventually evolved into the all-purpose automation extension that you see today. Since we’re a tiny shop with a shoestring budget, anything that you can contribute would be a blessing, whether it be posting how-to tutorials or answering questions in the support community. If you find Lightning Autofill useful and want to support its ongoing development, then please subscribe. We need all the help we can get. Thank you so much for your support. 🙏
37. Why do I keep having to reconnect my Google account?
If you’re using Microsoft Edge or Mozilla Firefox, you will be prompted to reconnect to your Google account every hour. This is a technical limitation of these browsers because they currently do not support the ability to automatically refresh authorization tokens required by the cloud sync feature whenever they expire. Google Chrome doesn’t have this issue because “you do not need to manage access tokens; the libraries automatically retrieve the credential, exchange it for an access token, and refresh the access token as needed” (source). This is an unfortunate situation, but sorry we do not have any control over it.
38. What’s the best way to troubleshoot Lightning Autofill issues?
To help us help you faster, it would be ideal if you could provide us with enough information to reproduce the issue on our end because the first step in resolving the issue is to be able to reproduce it. Please provide us with the following:
Your autofill rules – export the data to a CSV file and email it to us. You can export only the profiles that have issues through the Manage Profiles dialog (Lightning Autofill Options / Form Fields tab / Profiles dropdown menu / Manage Profiles). If the rules contain private information, then remember to remove the sensitive bits or replace them with dummy text.
URL of the form you’re having problems with – if the page requires a login or is behind a private portal, then create a guest or temporary account for us. If that’s not possible, then the next best thing is to save the page as HTML. You can save any web page by pressing Ctrl + S and selecting Save as type = “Webpage, Complete”. If you’re having a problem with only one specific field, then you can provide us with the HTML code for that field by right-clicking on it and selecting “Inspect” to bring up the Elements panel. This element should already be highlighted for you; to grab the HTML code, press Ctrl + C or right-click on the highlighted element and select Copy → Copy element (the wording may be different depending on which browser you’re using).
Step-by-step instructions on how to reproduce the issue. The more details you provide the better. It would be best if you could also provide a screen recording showing us the issue using a tool like Loom or ScreenRec (both free).
Error logs (if any) – Lightning Autofill can throw errors in two locations:
- Background page – to see if there are errors here, go to the extensions page (e.g.,
chrome://extensionsin Google Chrome) and click on “service worker” under Lightning Autofill (in Firefox, click the Inspect button). A new window should pop up; go to the Console panel. Make sure the dropdown menu to the right of the Filter input is set to “Default levels”. Any errors should be printed in red text in the console. - Content script – to see if there are errors here, go to the form you’re having problems with and bring up the JavaScript console by pressing F12 and clicking on the Console panel. Make sure the dropdown menu to the right of the Filter input is set to “Default levels”. Any errors should be printed in red text in the console.
- Background page – to see if there are errors here, go to the extensions page (e.g.,
39. The field autofills, but how come I still can’t submit the form?
Some sites use JavaScript validation to ensure that the user manually types the text into the field. Every form is different, but you can usually fool the validation by using dispatchEvent() to simulate user input. Example:
Type = JavaScript
Value =
const email = document.querySelector('input[name="email"]');
email.value = 'bob@smith.com';
email.dispatchEvent(new Event('input', { bubbles: true }));
If the input event doesn’t work, then try other events such as keyup, keydown, and change. We once came across a form that required a mouse click on the field (mousedown event) to properly validate the user input.
40. Is there a way to execute different profiles one after another?
Yes, starting with v13 you can use the AUTOFILL action to execute one profile after another.
👇 NOTE
The answer below is no longer applicable and is preserved here for historical reference only. The Autofill() function was removed in Lightning Autofill v12 because of the way MV3 extensions work. For improved security in the new MV3 world, all custom codes in JavaScript rules are executed in a different “context” than the extension, so they have no access to Lightning Autofill’s built-in functions such as Autofill().
Yes, starting with v9 you can execute profiles from a JavaScript rule. This way you can chain a bunch of profiles together by having the first profile execute; the first profile contains a JavaScript rule that executes the second profile, and so on. Here is the special function you can use to execute a profile: Autofill('profile ID', delay).
To execute profile c1 (the profile ID is displayed in the tooltip when you hover the mouse pointer over the profiles dropdown menu):
Autofill('c1');To execute the “All” profile:
Autofill('all');To execute the “Unfiled” profile after a 1.5-second delay (1500 ms):
Autofill('', 1500);You can even chain multiple commands together, like this:
Autofill('c1');
// Do some automation
Autofill('c2', 1000);
// Do some more automation
Autofill('c3', 2500);
41. How do I assign a hotkey to open the Lightning Autofill infobar?
To assign a global hotkey to activate the Lightning Autofill infobar:
- Chrome – go to
chrome://extensions/shortcutsand enter the hotkey for Lightning Autofill. - Edge – go to
edge://extensions/shortcutsand enter the hotkey for Lightning Autofill. - Firefox – go to
about:addons, click the gear icon, select “Manage Extension Shortcuts”, and enter the hotkey for Lightning Autofill.
You can close the infobar by clicking the “×” icon or pressing the Esc key.
42. How come I don’t see all my profiles / text clips in the context menu?
This can occur in Chrome when you have too many profiles or text clips. Chrome is limited to a total of 1000 context menu items (inclusive of the parent Lightning Autofill menu). This means, for example, if you have 1000 profiles set up, you would only see 997 profiles (the other three are used by the “Lightning Autofill”, “Add rules for this page”, and “Execute profile” menu items), and “Option” would not be displayed in the context menu.
43. Is it possible to create global rules for addresses?
While there is no one set of rules that can autofill 100% of the address forms on the internet, you can leverage the autocomplete attribute to create rules that would autofill a large number of address forms. For example, here’s a generic rule to autofill the first name:
Type = Text
Name = given-name
Value = Bob
44. How come my cloud sync isn’t working?
The most common reason is that when you connected your Google account, you didn’t give Lightning Autofill the proper permissions. Try disconnecting, then reconnecting, and ensure you check the appropriate box when prompted.
45. Can I sync changes in Google Sheets back to the extension?
Yes, as of version 12.11.0, you can enable the “Bi-directional cloud sync” option in Lightning Autofill Options / Settings tab under the Experimental section.
46. How many PCs can I install Lightning Autofill on per subscription?
We are currently not enforcing a limit on the number of computers you install Lightning Autofill on for each subscription plan. However, note that you can only be connected to one Google account at a time across all browsers on all devices for the cloud sync feature.
47. I can’t pay through Stripe—are there other payment options?
If you’re having trouble accessing Stripe Checkout, paying through Stripe Checkout, or if Stripe is not supported in your country, then we can also accept payment through cryptocurrency, PayPal, or Wise (formerly TransferWise). However, you’ll need to pay for the number of months in advance, and your subscription will automatically cancel after the paid number of months. This means you’ll have to manually renew your subscription when it expires since there is no Stripe integration. Please go to Other Ways to Pay if you want to proceed with this.
48. What happened to the yearly subscriptions?
As we announced in the February 10, 2024 News update, yearly subscription plans are no longer offered. Too many people forgot that they had subscribed the year before and reported the renewal charge on their credit card bill as fraudulent, which was a big headache for us. The latest plans are listed here:
49. How do I activate my subscription?
Here’s how to activate your subscription plan:
- Open Lightning Autofill Options and go to the Settings tab.
- Enter the first part of the invoice number in the “Invoice number” field under the Subscription section. The invoice number can be found in our welcome email or Stripe’s order confirmation email (if you never received them, then check your spam/junk folder). For example, if your invoice number is ABCD1234-001, then you would enter ABCD1234 in the invoice number field. Note that the invoice number is NOT the receipt number (which looks like #1234-5678), so be sure you are using the invoice number to activate.
- Click the Activate button. After a few seconds, it should change to “✔ Activated”.
50. I still can’t activate—what is this “Failed to fetch” error?
If you still cannot activate your subscription plan because of the “Failed to fetch” error, then it’s likely that your internet service provider, home router, company network, or maybe even your country is blocking our lightningautofill.com domain. In this case, you have two options:
Ask your network administrator to whitelist our
lightningautofill.comdomain (including all its*.lightningautofill.comsubdomains).Use a VPN service. If you don’t have your own VPN, then we recommend Windscribe, the best free VPN with a generous free data quota. If you sign up using the link below, we both get an additional 1 GB of data every month! 🥳
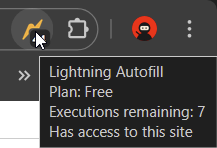
51. How do I know how many profile executions I have left in the Free plan?
You can see your remaining executions for the day by hovering the mouse pointer over the Lightning Autofill extension icon, like this:
52. How do I see my subscription key after it’s activated?
You can see your subscription key by double-clicking on the invoice number field in Lightning Autofill Options / Settings tab. This field is intentionally blurred out as an additional security measure in case you take a screenshot or do a screen recording to share with others.
53. I know how to add profiles, but how do I delete them?
You can delete profiles from the Manage Profiles dialog (Lightning Autofill Options / Form Fields tab / Profiles dropdown menu / Manage Profiles). The Manage Profiles dialog also allows you to add, rename, reorder, duplicate, and export profiles.
54. It says I’m already connected to another Google account—now what?
Even though you can install Lightning Autofill on as many computers as you want, you can only be connected to one Google account at a time across all instances of the extension. If you’re already connected to one account and try to connect to a different account in another browser, you will get this error. To resolve this, you will first need to disconnect from the other account. Please follow these steps to disconnect the other account:
- Go to Lightning Autofill Options / Sync tab.
- Click the Connect button.
- Select the Google account mentioned in the error message.
- Once you’re connected, click the Disconnect button.
- Click the Connect button again.
- Select the Google account you’d like to use.
55. How do I get an element’s CSS selector / XPath?
Here’s how to get an element’s CSS selector or XPath:
- Right-click on the element and select “Inspect”.
- This element should be highlighted for you in the Elements developer tools panel. Right-click on the element’s HTML code and select Copy → Copy selector to get its CSS selector, or Copy → Copy XPath to get its XPath (the wording may be different depending on which browser you’re using).
Note that using CSS selectors or XPaths provided by the browser through the Copy context menu will not be as reliable as the autofill rules generated by Lightning Autofill’s infobar because they are dependent on the web page’s underlying HTML structure. That means if the page’s HTML code ever changes, then these overly specific CSS selectors or XPaths can stop working, breaking those autofill rules. The rules generated by Lightning Autofill rely on attribute matching, so they are generally much more reliable.
A good use case for using a CSS selector or XPath is on the rare occasion a form field has no attribute with a unique value that can be used to match against. Lightning Autofill already takes this into account, as its rules generator contains logic to generate efficient CSS selectors or XPaths as a fallback if no autofill rules can be generated from attributes alone.
56. Why did you move to the freemium model?
In short, it was out of necessity. Please see our Freemium Notice for more information.
57. How do I change or cancel my subscription?
You can switch plans or cancel your subscription in Stripe’s customer portal. Instructions:
- Go to Lightning Autofill Options / Settings tab.
- Click the Manage Subscription button. You should be automatically signed in. If you ever have to sign in manually, be sure to use the same email address you used when subscribing (check the spam/junk folder if you don’t receive Stripe’s sign-in link).
- Click the Update Subscription button to change your plan, or click the Cancel Subscription button to cancel your plan.
When upgrading or downgrading your subscription plan, your next bill will be prorated.
58. Can I edit rules in bulk?
Yes, you can edit multiple rules at once in either Google Sheets or a text editor.
Google Sheets (Plus or Pro plan required)
- Do your mass edits like global search and replace in the active spreadsheet.
- Go to Lightning Autofill Options / Sync tab.
- Click the Sync from Sheets button.
Text editor
- Go to Lightning Autofill Options / Sync tab.
- Click the Export button to save your data to a CSV file.
- Open the CSV file in a text editor.
- Do your mass edits like global search and replace (don’t forget to save the file).
- Import the updated CSV file.
59. I subscribed, but why do I still see “exceeded the daily profile execution limit”?
If you’ve already subscribed, but you’re still seeing the “exceeded the daily profile execution limit” message when you execute a profile, then there could be one of three possibilities:
- You haven’t activated your plan yet.
- Your subscription was deactivated. This can happen when the network connection is poor, you connect to a network guarded by a restrictive firewall, or anything else that can block communication with our subscription validation service.
- Your last payment failed. If your payment fails repeatedly, then Stripe will automatically cancel your subscription.
In the majority of cases, it’s either 1 or 2, in which case please refer to FAQ #49 to activate your plan. If you’re not able to activate your plan, please contact support@tohodo.com and we will look into your case.
60. How do I create global rules that execute regardless of the active profile?
To create autofill rules that automatically execute on page load no matter what profile is active, follow these steps:
- Create a new profile and call it something like “Global”. Leave the profile Site field blank.
- Add the global autofill rules to the profile you created in step 1. Leave the Site column blank.
- Hover the mouse pointer over the profile selector at the bottom and make a note of the profile ID (it starts with “c” followed by a number).
- Go to the Advanced tab and enter this (replace “c1” with the actual profile ID from step 3):
c1: all=trueIf you want the rules in this profile to auto-execute even when in manual mode, then also add the forcefill parameter:
c1: all=true forcefill=true61. Why do I keep getting “Data is already synced”?
When syncing data to and from Google Sheets, the file’s last modified date is compared to the lastmod timestamp in your data. If the timestamps are the same, then no sync operation is performed to save bandwidth, and you get the “Data is already synced” status message. If you are getting this message when you click the Sync from Sheets button even after making recent changes in Google Sheets, then please wait a few minutes before trying again because the last modified date is not always updated immediately when you update the spreadsheet.
62. How do I restore data that was wiped after an update?
In the extremely rare case that you lose all your data after Lightning Autofill was updated, starting with v14.7.0 there is a local backup that you can use to restore your data. Here’s how:
- Go to Lightning Autofill Options.
- Open developer tools (F12 or Ctrl + Shift + I).
- Click the Console tab.
- Enter
localStorage.backupinto the console. - Right-click on the text and select “Copy string contents”.
- Paste this text into a text editor and save it (e.g.,
backup.csv). - Import this file into Lightning Autofill.
63. What does AF/LA/LAF mean?
Before v12, Lightning Autofill was called Autofill, and back then some people referred to it using the acronym AF. We changed the name to Lightning Autofill because many people were confusing it with the browser’s built-in autofill feature. These days, you may see people referring to Lightning Autofill by the acronyms LAF or LA. Although we are guilty of using LAF in the past, we now prefer the acronym LA because it’s spelled Lightning Autofill, not Lightning AutoFill.
64. How do I change my email address?
You can update your email in Stripe’s customer portal. Instructions:
- Go to Lightning Autofill Options / Settings tab.
- Click the Manage Subscription button. You should be automatically signed in.
- Click the Update Information button under “Billing Information”.
- Update your email address and click the Save button.
65. Why did Lightning Autofill suddenly stop working?
This can happen after a major update, like going from v13 to v14. If you encounter any issues, please try the following steps because they have worked for many users:
- Back up your data to a CSV file.
- Uninstall the extension.
- If your browser has pending updates, update and restart the browser. You can check to see if there are any pending updates by clicking menu / Help / About.
- If Windows has pending updates, update Windows and restart your PC. You can check to see if there are any pending updates by going to Settings / Windows Update.
- Reinstall the extension.
- Import your data from the CSV file in step 1.
66. How come sometimes it doesn’t autofill correctly?
If you find that Lightning Autofill is unreliable or inconsistent on certain web pages, it’s like because it’s operating too fast for the page to keep up. You can experiment with these two options in Lightning Autofill Options / Settings tab to slow it down for improved reliability:
- Enable the “Execute in order” option
- Disable the “Turbo” option
67. Can I use Lightning Autofill on my phone?
Lightning Autofill will be coming to Microsoft Edge for Android soon, and possibly iOS in the future. If you cannot wait, then you can preview it in Edge Canary. Here’s how to add the extension to Edge Canary:
- Install Edge Canary for Android
- Enter
edge://flagsin the browser address bar - Search for “Android Extension Search” and enable it
- Restart Edge
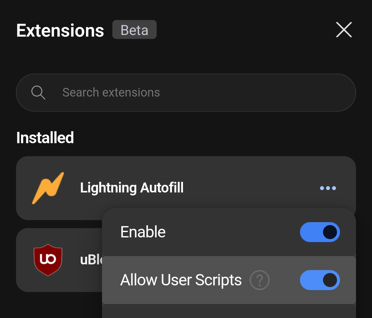
- Tap Menu / Extensions / Manage Extensions
- Search for “Lightning Autofill” and install it
- Tap the Lightning Autofill menu and enable “Allow User Scripts”
How to access the Options page:
- Go to a web page
- Tap Menu / Extensions / Lightning Autofill to open the infobar
- Tap the bolt icon
There’s a known bug where the infobar may be cut off on mobile. This will be fixed in version 15.
Note that you do not need to get a new license to use Lightning Autofill on Edge for Android if you already have a valid subscription – you can use the same subscription key to activate.